
Outlook 2013 Settings Update
General Email Settings
Incoming Server Settings
Account Type: IMAP (or POP3 if preferred)
Incoming Server: m.net10.net
SSL: Enabled
Incoming Port: 993 (995 for POP3)
Username: Your full email address
Outgoing Server Settings
Outgoing Server: m.net10.net
SSL: Enabled
Outgoing Port: 465
Username: Your full email address
These settings are for updating your existing account in Outlook 2013. If you need to set up your account for the first time, please refer to the account setup instructions.
- Open Outlook and select the File menu.
- Click on Account Settings and then Account Settings again.
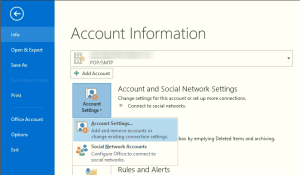
- Click on your Net10 email account so that it is highlighted. (Note: If you have more than one Net10 email account, you will need to repeat these steps for each one.)
- Click Change.
- Take note of whether your Account Type is set to POP3 or IMAP.
- Set Incoming mail server and Outgoing mail server (SMTP) to m.net10.net
- Under Logon Information, set User Name to your full email address and enter your password in the Password box.
- Uncheck the Require logon using Secure Password Authentication (SPA) box if it is checked.
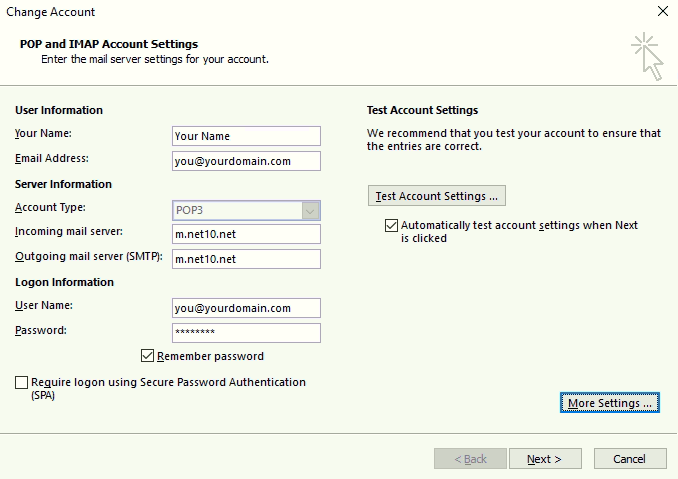
- Click on More Settings.
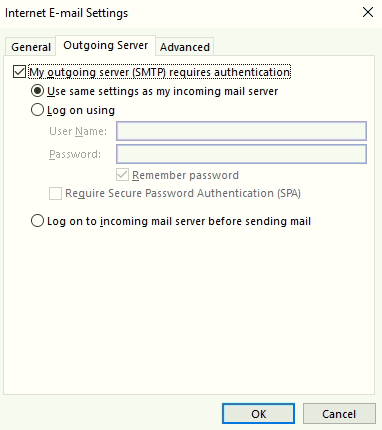
- Click on the Outgoing Server tab.
- Check the My outgoing server (SMTP) requires authentication box, and select the Use same settings as my incoming mail server option.
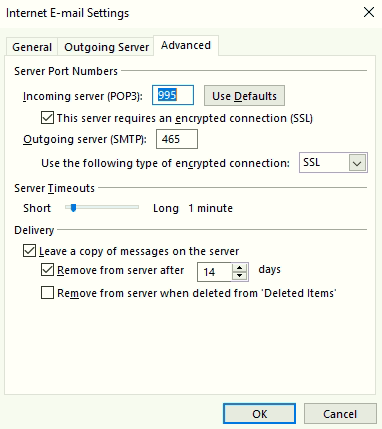
- Click on the Advanced tab.
- Check the This server requires an encrypted connection (SSL) box. If the Incoming server line says (IMAP), the port number box next to it should be set to 993. If it says (POP3) the port number box should be set to 995.
- Set the Use the following type of encrypted connection box to SSL.
- Enter 465 in the box next to Outgoing server (SMTP).
- Click OK.
- Click Next.
- Click Done or Finish.