Outlook 2013 Email Setup
General Email Settings
Incoming Server Settings
Account Type: IMAP
Incoming Server: m.net10.net
SSL: Enabled
Incoming Port: 993
Username: Your full email address
Outgoing Server Settings
Outgoing Server: m.net10.net
SSL: Enabled
Outgoing Port: 465
Username: Your full email address
These settings are for adding a new account to Outlook. If you need to update the settings for your existing account, please refer to the settings update page.
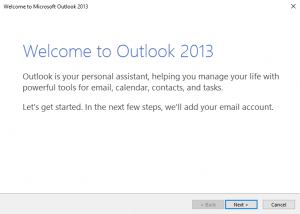
- Open Outlook. If this is the first time you are running Outlook (such as on a new computer), you will be presented with a Welcome dialog like the one below – click Next twice. (If this is not the first time you are setting up Outlook on this computer, click on File and then click on the Add Account button.)
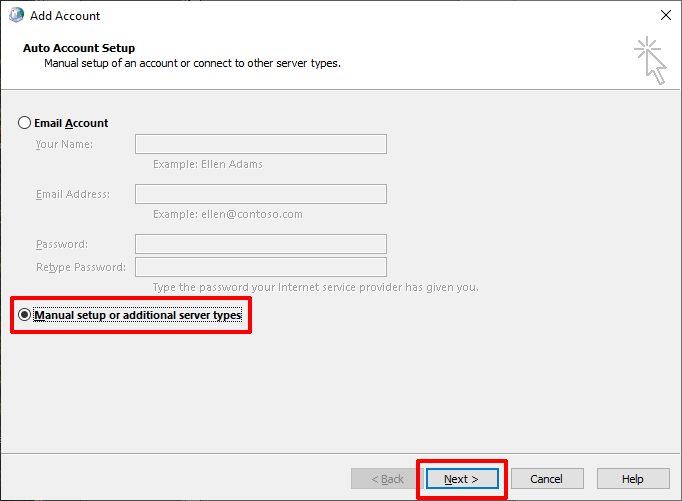
- Select Manual setup or additional server types and then click Next.
- Select POP or IMAP and then click Next.
- Enter information as follows:
Your Name: Your name as you want it to appear on your outgoing email messages
E-mail Address: Your full email address
Account Type: IMAP
Incoming mail server: m.net10.net
Outgoing mail server (SMTP): m.net10.net
User Name: Your full email address
Password: Your email password
Check Remember password if you do not want to be prompted to enter your password each time.
DO NOT CHECK Require login using Secure Password Authentication (SPA).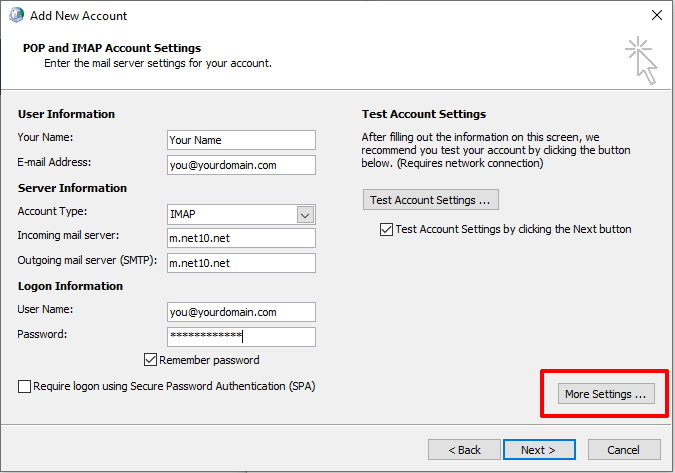
- Click More Settings.
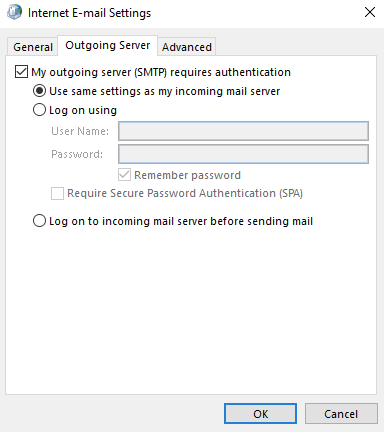
- Click on the Outgoing Server tab.
- Check My outgoing server (SMTP) requires authentication.
- Select Use same settings as my incoming mail server.
- Click on the Advanced tab.
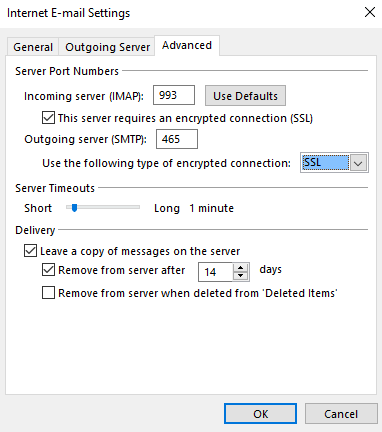
- Under Incoming server (IMAP), check This server requires an encrypted connection (SSL). Set the port number in the box next to Incoming server to 993.
- Under Outgoing server (SMTP), select SSL in the Use the following type of encrypted connection box. Set the port number in the box next to Outgoing server to 465, as shown.
- Click OK.
- Click Next.
- Click Finish or Done.
