
Add Net10 Email to Gmail
These instructions are for adding your Net10 email account to your Gmail account. If you already have your Net10 account added to Gmail and just need to update your settings, scroll down to the Update Existing Settings section.
- Log into your Gmail account.
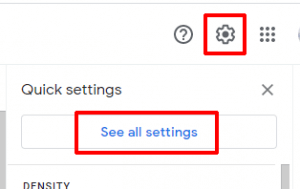
- Click the gear icon at the top right corner and then click See all settings.
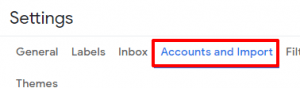
- Click on Accounts and Import.
- Scroll down to Check mail from other accounts and click on Add a mail account.

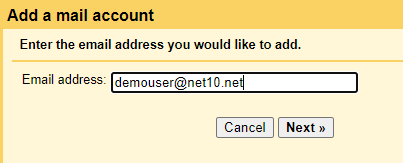
- Type the email address of your Net10 account in the Email address box, then click Next >>.
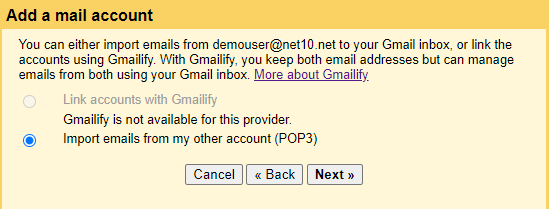
- Select Import emails from my other account (POP3) and then click Next >>.
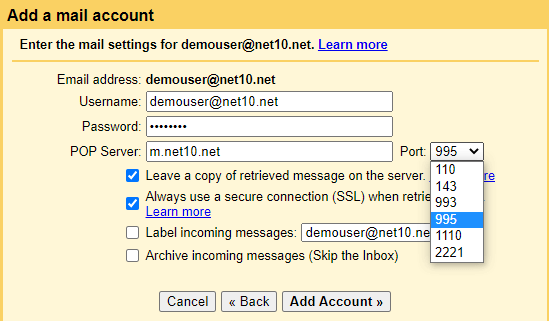
- Enter the email address of your Net10 account in the Username box, and your Net10 email password in the Password box.Enter m.net10.net in the POP Server box.
Select 995 in the Port drop-down box.
If you plan to access your Net10 account outside of Gmail, check the Leave a copy of retrieved messages on the server. If you plan to only access your Net10 account via Gmail, leave this box unchecked.
Make sure that the Always use a secure connection (SSL) when retrieving box is checked.
Click Add Account >>.
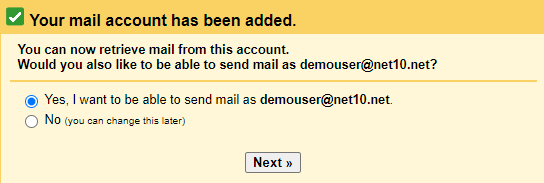
- Select the Yes, I want to be able to send mail as… option and click Next >>.
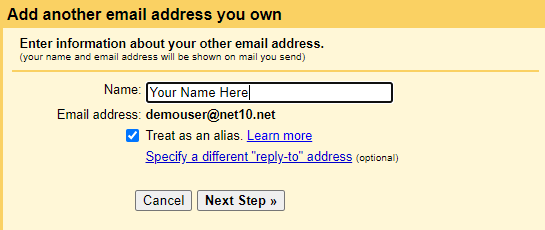
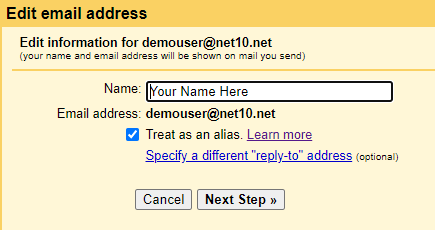
- In the Name box, enter your name as you would like it to appear on your outgoing messages. Leave the Trest as an alias box checked, and then click Next Step >>.
- In the SMTP Server box, enter m.net10.net
Select 465 in the Port drop-down box.
Enter the email address of your Net10 account in the Username box, and your Net10 email password in the Password box.
Make sure that the Secured connection using SSL option is selected.
Click Add Account >>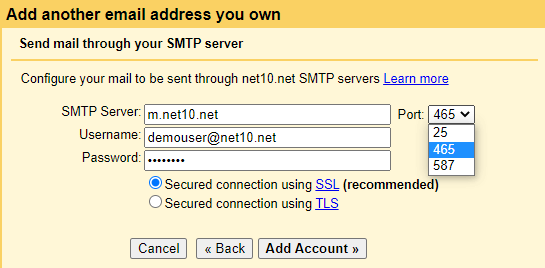
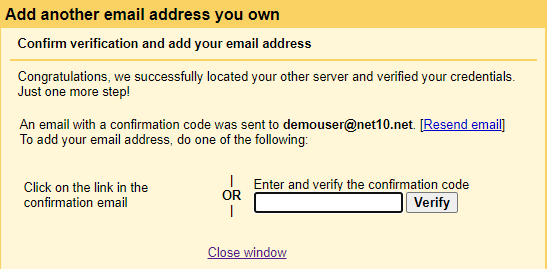
- Gmail will now send a verification code to your Net10 account. You can use your existing email client, or Net10 Webmail to log into your Net10 account and retrieve the code. Once you have it, enter it in the Enter and verify the confirmation code box and click Verify.
- Your account is now added to Gmail and you will see it appear in your Gmail settings under Check mail from other accounts.

- Incoming email will be placed in your Gmail inbox, and when you send messages you will have the option to select your Net10 account in the From drop-down of the message composition window.
Update Existing Settings
If you already have your Net10 account added to Gmail and just need to verify/update your settings, follow these instructions:
- Log into your Gmail account.
- Click the gear icon at the top right corner and then click See all settings.
- Click on Accounts and Import.
- Scroll down to Check mail from other accounts and click on edit info next to your Net10 account.

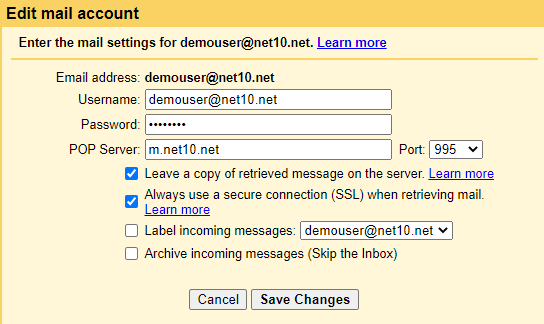
- In the Username box, enter the full email address of your Net10 account. Enter your Net10 email password in the Password box.
Verify that POP Server is set to m.net10.net
Select 995 in the Port drop-down box.
Check the Always use a secure connection (SSL) when retrieving mail box.
If you plan to only access your Net10 Email account via Gmail, uncheck the Leave a copy of retrieved messages on the server box. Otherwise, leave this box Checked.
Click Save Changes.
- Scroll up to the Send mail as section and locate your Net10 mail account. Click the edit info link next to it.

- Verify that the Name box contains your name, as you would like it to appear on messages that you send out. Check the Treat as an alias box.
Click Next Step >>.
- In the SMTP Server box, enter: m.net10.net
Select 465 in the Port drop-down box.
In the Username box, enter the full email address of your Net10 email account.
Enter your Net10 email password in the Password box.
Select the Secured connection using SSL option.
Click Save Changes.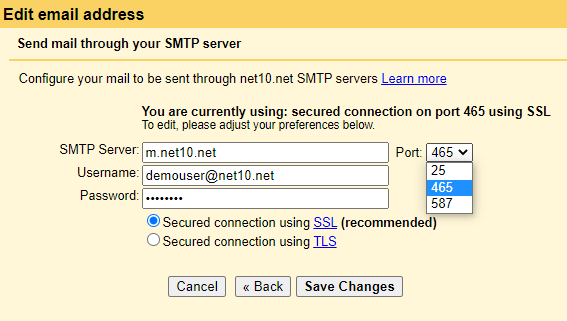
- Your settings have now been updated and you can use Gmail to send/receive mail from your Net10 email account.