
Apple Mail Setup Instructions
iPhone General Email Settings
Incoming Server Settings
Account Type: IMAP
Incoming Server: m.net10.net
SSL: Enabled
Incoming Port: 993
Username: Your full email address
Outgoing Server Settings
Outgoing Server: m.net10.net
SSL: Enabled
Outgoing Port: 465
Username: Your full email address
These instructions are for adding your account to the Apple Mail application on your Mac. For updating settings on your existing account, please see the updating settings document.
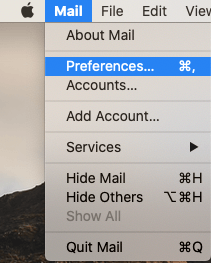
- Launch the Mail application.
- From the Mail menu, select Preferences.
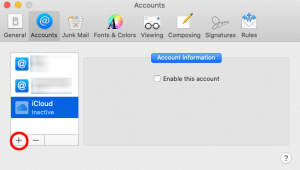
- Click on the Accounts button at the top of the window.
- Click on the + sign at the lower left corner of the window.
- Select Other Mail Account and click Continue.

- In the Name box, enter your name as you’d like it to appear on your outgoing emails. Enter your full email address in the Email Address box, and your email password in the Password box.
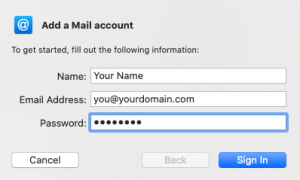
- Click Sign In.
- A message indicating Unable to verify account name or password will appear, along with some new fields.
- In the Account Type field, select IMAP.
- In both the Incoming Mail Server and Outgoing Mail Server fields, enter m.net10.net
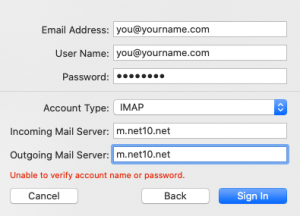
- Click Sign In again.
- On the next screen, make sure the Mail box is checked and click Done.

- Select your newly created account in the left column and then click the Server Settings button at the top of the window.
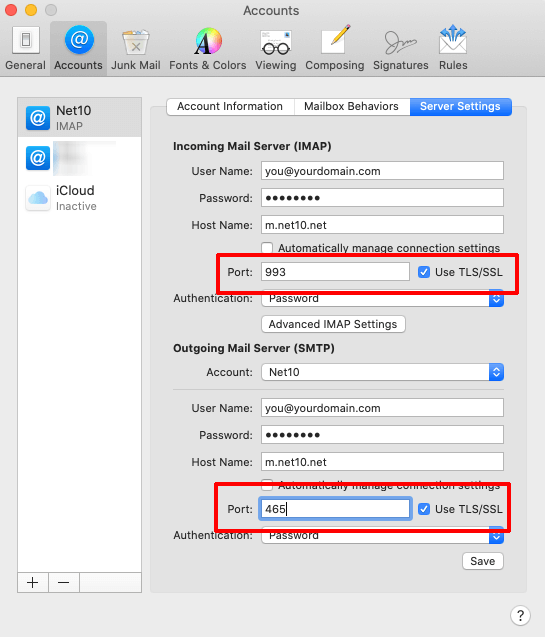
- Uncheck the Automatically manage connection settings box under both Incoming Mail Server (IMAP) and Outgoing Mail Server (SMTP).
- Under Incoming Mail Server (IMAP), make sure the Use TLS/SSL box is checked and set the Port to 993.
- Under Outgoing Mail Server (SMTP), make sure the Use TLS/SSL box is checked and set the Port to 465.
- Click the Save button and then close the Accounts window.
- Your mail account is now set up in Apple Mail.